
Testing our Function – P3
In the third part of this series, we will test the function created previously. Some may say that this step is optional ; why not go directly to implementation ? We could test our function at the same time as testing our entire dashboard. Yeah, you’re right, that works too… until it doesn’t.
Why is it important to test our function independently, before implementation ?
I will not waste your precious time stating the obvious, so I’ll go with a simple example. Let’s say you create a function and, without any test, go directly to implementation. You put a button on your dashboard, wire the function with some DataView fields and hit the Play Button. As expected, nothing works (don’t fool yourself, it never works the first time and if it does, that’s even more suspicious). Now, how do you debug this thing ? Is the issue :
- The button event not firing ?
- The Erp-Function widget not configured correctly ?
- The DataView fields passed to the function does not exist ?
- The syntax used to retrieve the DataView fields is wrong ?
- The function is not deployed to production ?
- The function has a compilation error ?
- The business logic in the function is simply wrong ?
So you spent an hour just to actually find where the error is coming from, then correct the bug. You try again, fire up the dashboard, click the button and Bingo, everything works and you proceed with the next feature. Not so fast ! What would happen if :
- The end user enters a wrong value in a field ?
- The DataView field is null or empty for some reason ?
You get the point. Take your time to not only test your function first but test it right. By that I mean “It must work as expected no matter what garbage inputs the end users sends its way”. Once you tested your function and you’ve got 100% confidence in it, then (and only then) proceed to implementation. Trust me, you’ll save a bunch of time down the road.
How to test functions : Epicor Rest API Interactive help page
There are different ways to test Epicor Functions and this one is by far my favorite. But if, for some reason, you find that too complicated, scroll down to the “I cannot/don’t want to use the Rest Api Help page, what else can I do ?” section at the end of this post.
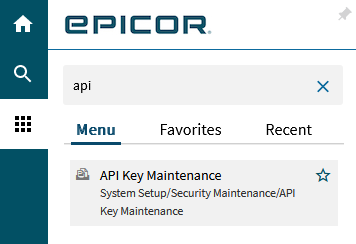
The first thigs we need before getting to the Rest Api help page is to create an API Key. Open Api Key Maintenance.
Click on the “+” to create a new one.
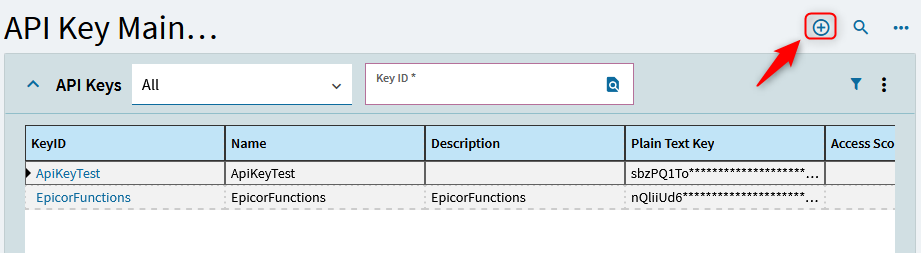
And enter the required values. We will not get into the fine details of API Keys management in this post, like specifying Access Scope for example. The Epicor Help will give you a lot of information on this.

Hit the Save button. At this very moment, the API Key will appear on screen. Make sure to copy that thing somewhere safe because it will be the only time you will ever see it in plain text like this.

It is important to never share your API Key and server URL to anyone on the internet. Think of it like sharing your bank account number an PIN ; you don’t want to give anyone access to your hard earned money, same goes with your Epicor server.
Now, to access the Rest API help page, you need to find the URL specific to your Epicor server and instance. The URL is shaped like this : https://%5BKineticServer%5D/%5BKineticInstance%5D/apps/resthelp/.
You should be able to find those information in the Epicor Administration Console :

So, for example, if the URL found in the Administration Console is “https://SQL.mycompany.com/ErpCRP”, the Rest Api help page URL should be “https://SQL.mycompany.com/ErpCRP/apps/resthelp”.
Open your favorite browser and enter this URL. If it doesn’t work, try another browser (Chrome, Firefox, Edge, etc.) If you still can’t access the help page, there may be an issue with certificates or whatnot. Contact your sysadmin, your VAR or Epicor support to help you out, it will be worth it.
And if you really are not able to access the Rest Api Help page after all that, or if you are just not interested in all that hassle, refer to “I cannot/don’t want to use the Rest Api Help page, what else can I do ?” section at the end of this post.
Anyway, the Rest Api help page looks like this :

Click the “Browse” button (I don’t know how to call that thing) and find Epicor Functions.
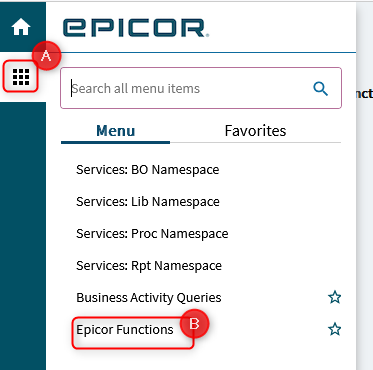
Select your current company then find your function library.

The list of Epicor Functions will then appears on the page.

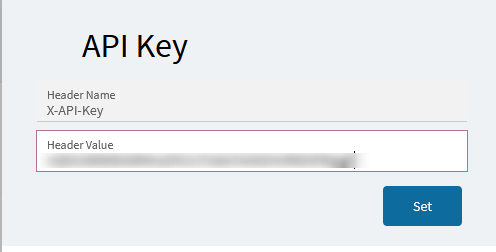
Click on the “API Key” button at the top of the page.
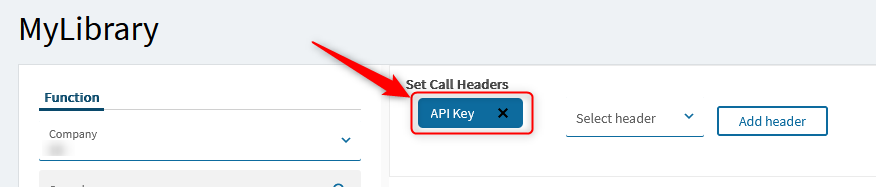
Enter your API Key in the field and click SET.
Back in the previous page, select your Epicor Function and click on “Try it out”.

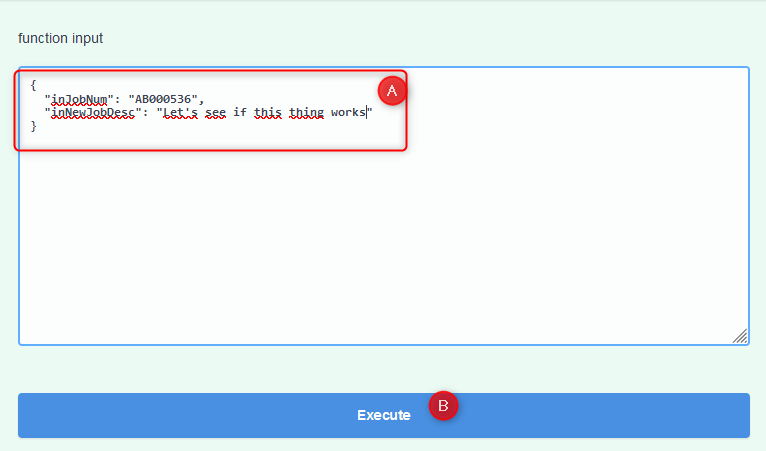
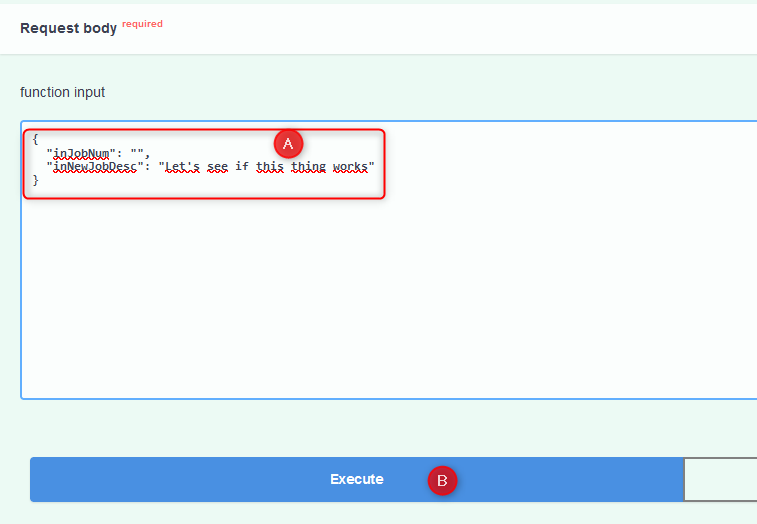
This is where it gets interesting. Scroll down to the Function Input section and you will find all the parameters required by your function, and the expected data type.

Input your own values and click on Execute.
A couple seconds later, scroll down the page to find the Response section.
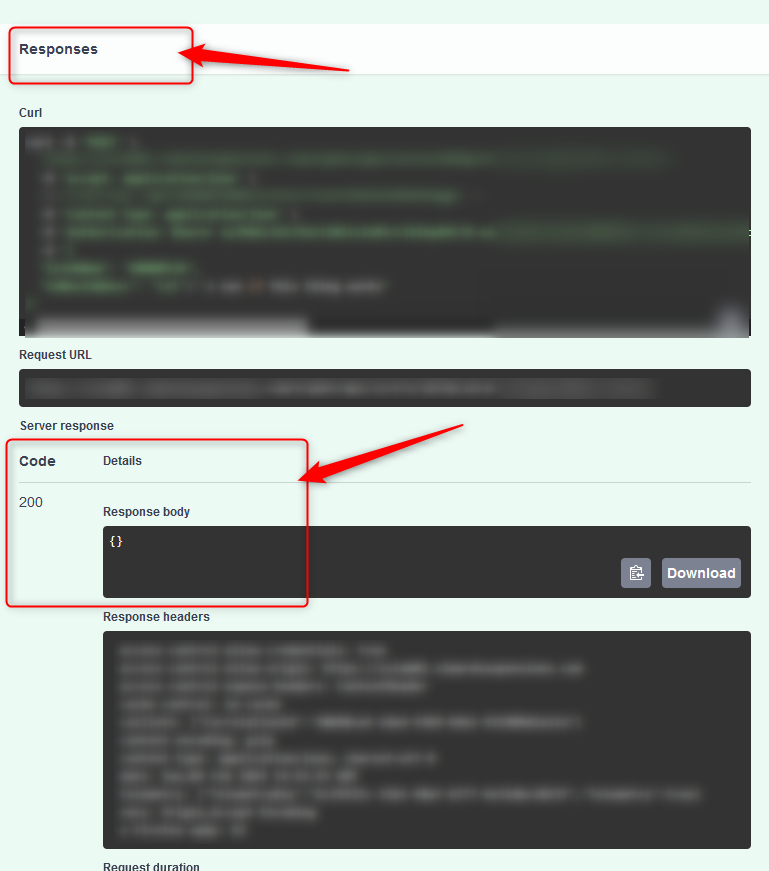
We see code 200 and an empty Response Body. That’s your function own way to tell you that everything worked and no error has occurred. Let’s see what happened in the actual Job.
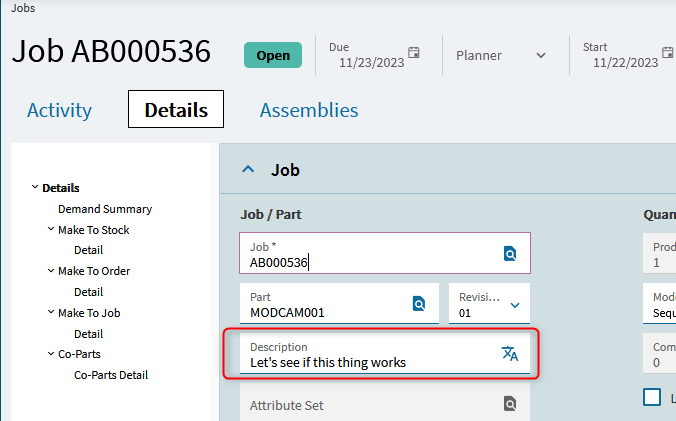
Damn, it worked on the first try ! Now let’s throw some shit in the fan.
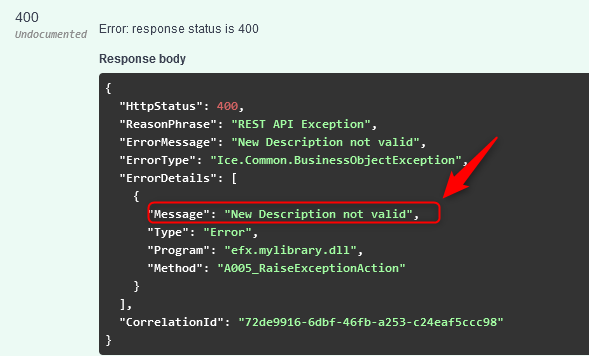
Try again with an empty JobNum.
Oh it didn’t like it. But it is expected from our logic, and we can find our error message right here :

One more test with an empty description :

Final Notes
- Tools like Postman can also be used to call Epicor Functions, which can offer greater details on header and response handling.
- The Rest Api Help page is a great tool to test other stuff as well. As can be seen in the browser, you have access to BAQs and business objects. That’s a great place to explore and learn new stuff about the Epicor backend if you are a little curious by nature.

I cannot/don’t want to use the Rest Api Help page, what else can I do ?
When there’s a will, there’s a way.
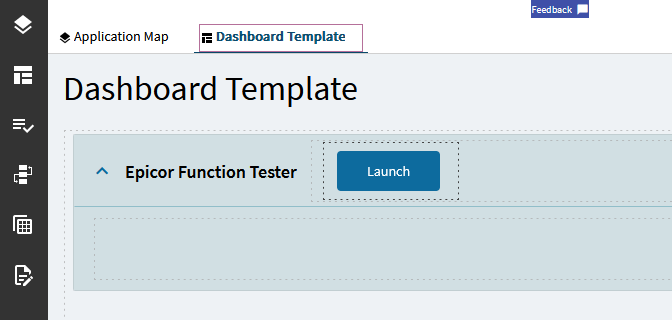
Fire up Application Studio and create a brand new dashboard named Epicor Function Tester.


Enter this new dashboard and edit the main page.

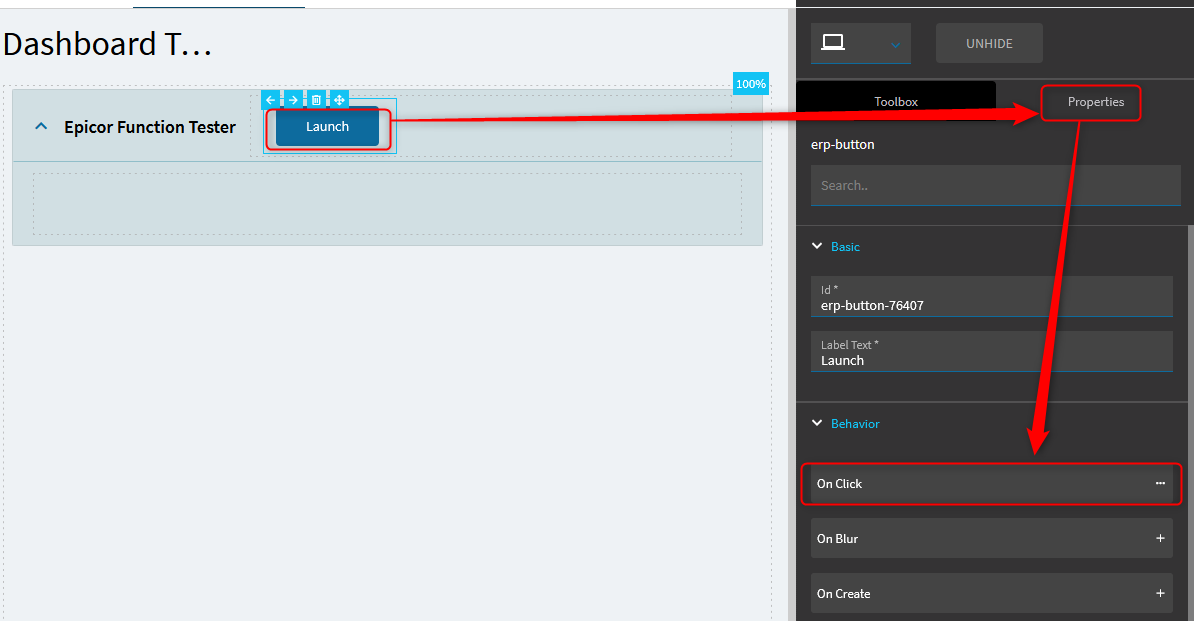
Drop a Panel Card and then a Button on the canvas. Rename those controls so that it looks good.
Open the On Click event of the button.
First, drop an ERP-Function widget on the canvas.
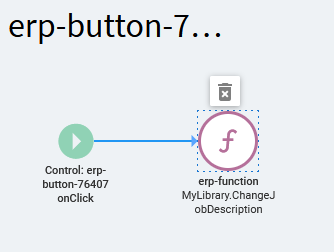
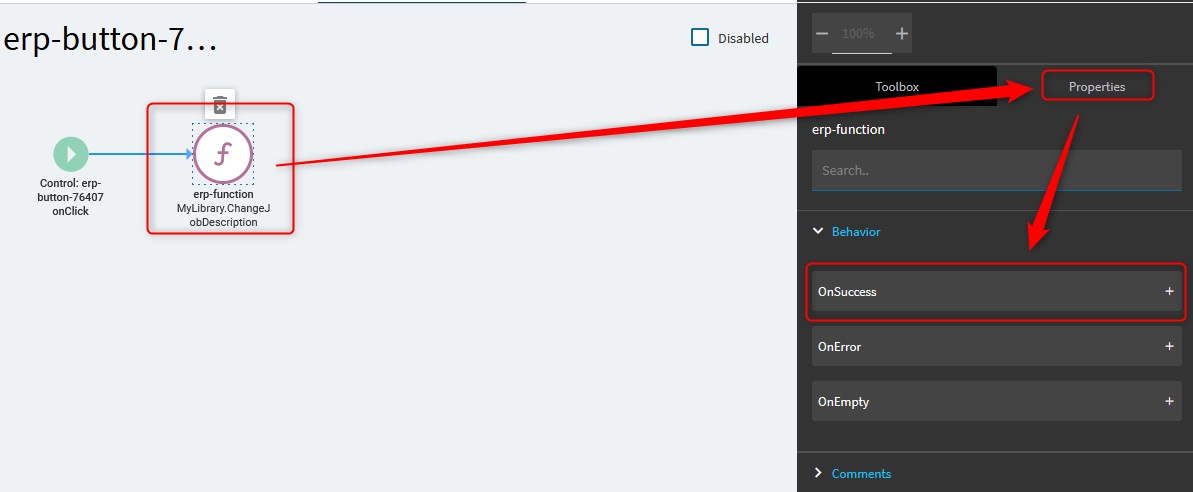
Open the On Success event of the ERP-Function widget.
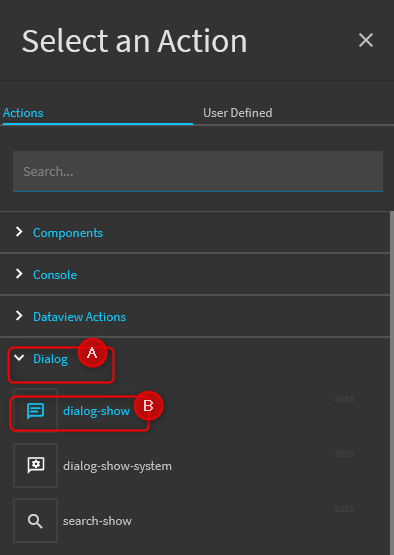
Choose the Dialog-Show widget.
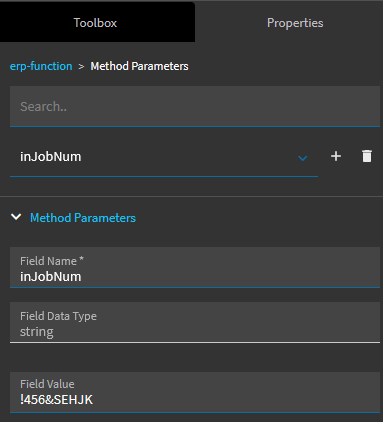
Get to the Advanced properties of the widget and select Param.

Configure it like this :

Make sure to save your progress. Now you’ve got on your hands an Epicor Function Tester dashboard, which you can use to test any Epicor Functions. All you have to do is manually configure the ERP-Function widget.
First, choose your library and function.

Then we will set the input parameters of the function.

First the JobNum.

Then a new description.

Save and click on the Play button.

Your application will open; click on the Launch button and let’s see what happens.

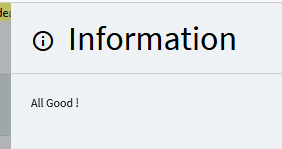
If all is fine, this slide panel should open :
Let’s see the result in the Job :

Sounds good ! Now what happens if the function encounter an error ? Let’s try with an invalid JobNum.
When we launch the function, the following panel appears :

There you have it : a simple way to test your Epicor Functions in isolation. This method is not as fast and complete as the Rest Api help page but whatever : as long as it gets you going.
In the next post, we will end this series with the actual implementation of our function.
Stay tuned, and go get things done.
Source: https://www.allaboutthaterp.com
Building a function – P2
In the second part of this series, we will continue our example by actually building the function. If you’re a regular, you know my style : we’ll walk step by step, with a truckload of screenshots.
Add References
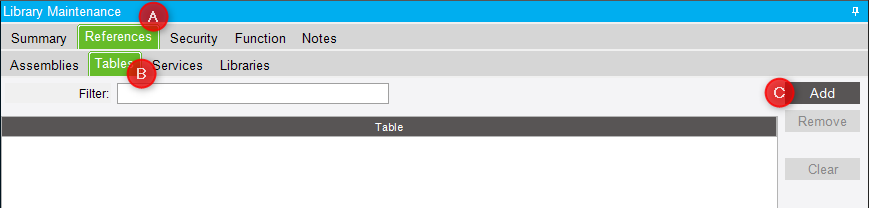
One big difference between Functions and BPMs is that you have to add references to tables and business objects manually. Since we will be updating jobs, we will need to add a reference to the Job Entry business object and JobHead table.
Open the References – Tables tab and click the Add button.
Search for the JobHead table and click OK.

Now open the References – Services tab and click Add.

Search for the Job Entry business object in the erp schema and click OK.

Design the function
Get to your function and click the Design button to open the canvas.

First thing we’ll want to do is validate our inputs. We’ll make sure that the JobNum exists before going any further.
Drop a Condition widget on the canvas. To rename the widget, simply double click on the header and change it.

We will use the “Number of rows in Query” condition.
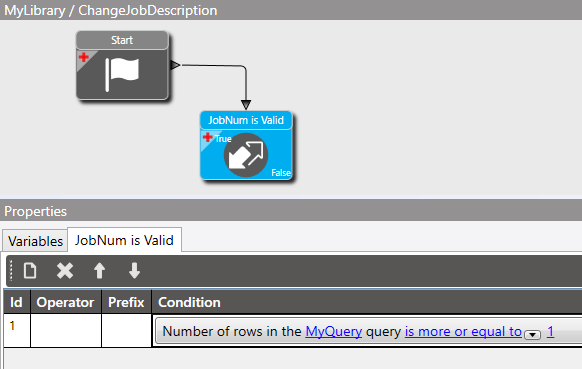
Click on “MyQuery” to configure the query like this :

This query will return a record from JobHead if the JobNum is valid. And if a record is returned, the Condition widget will return True.

Now we will add a Raise Exception widget on the canvas and wire it like this :

If we pass an invalid JobNum to our function, an error message will be returned.
And if the JobNum is valid, we will continue our processing with validating the description, with another Condition widget. We want to make sure that the new description is not and empty string.
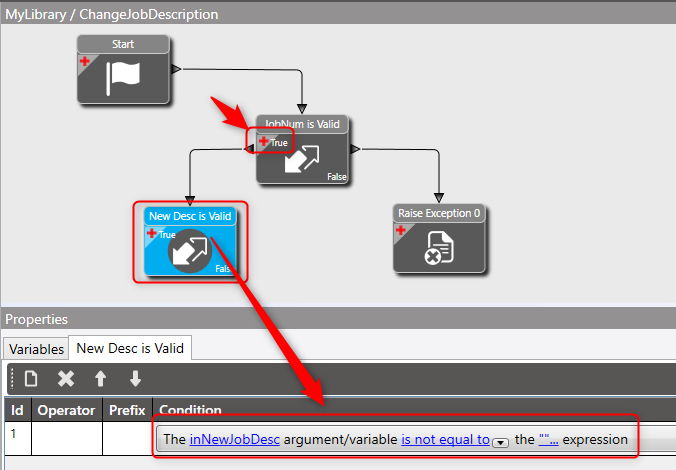
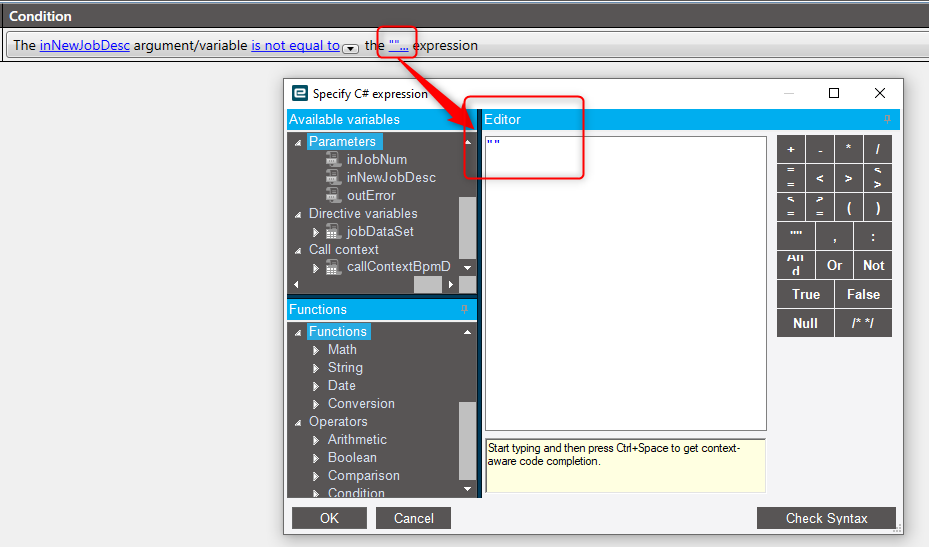
As we did previously, we will return an error if the description is empty.

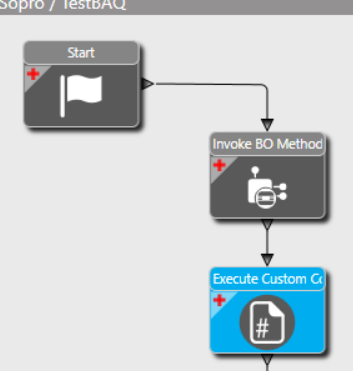
If all our parameters are valid, we will proceed with fetching the job from the database to change its description. We will use a “Invoke BO Method” widget, configured to call the GetByID method of the Job Entry business object. If you can’t select the business object, review the Add References section at the beginning of this post.
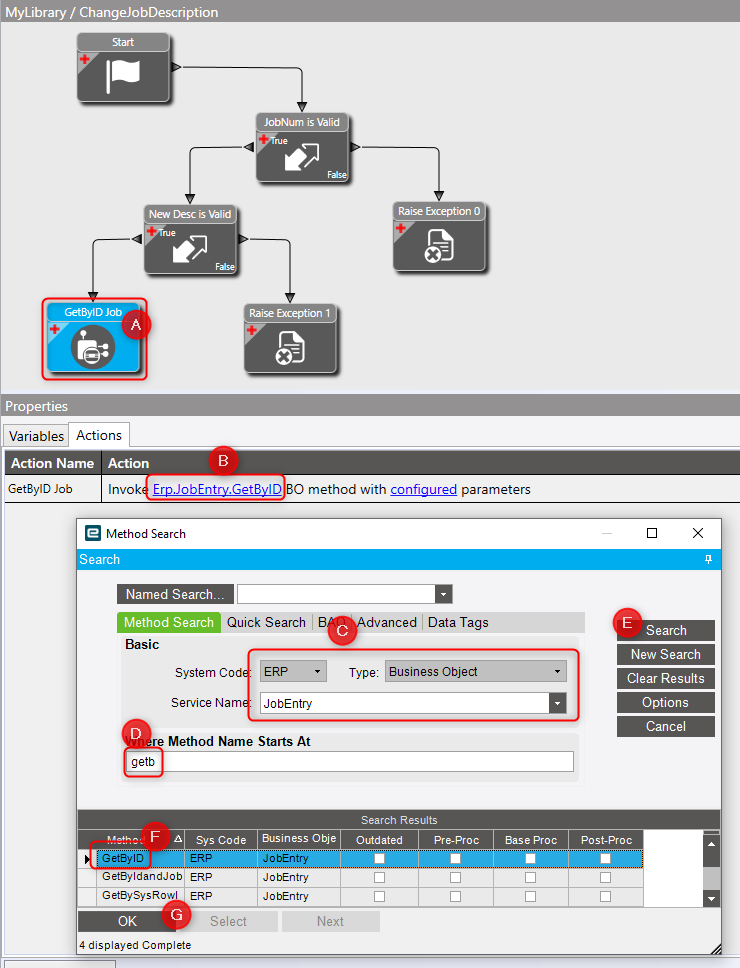
We will now configure the business object call, by passing it our inJobNum parameter.

The business object requires a TableSet, which we will create as a brand new variable.


This widget will essentially fetch the job record from the database and store it in the jobDataSet variable we just created. We will now alter this Tableset to modify the job description.
Drop a “Set Field” widget on the canvas and configure it like this :
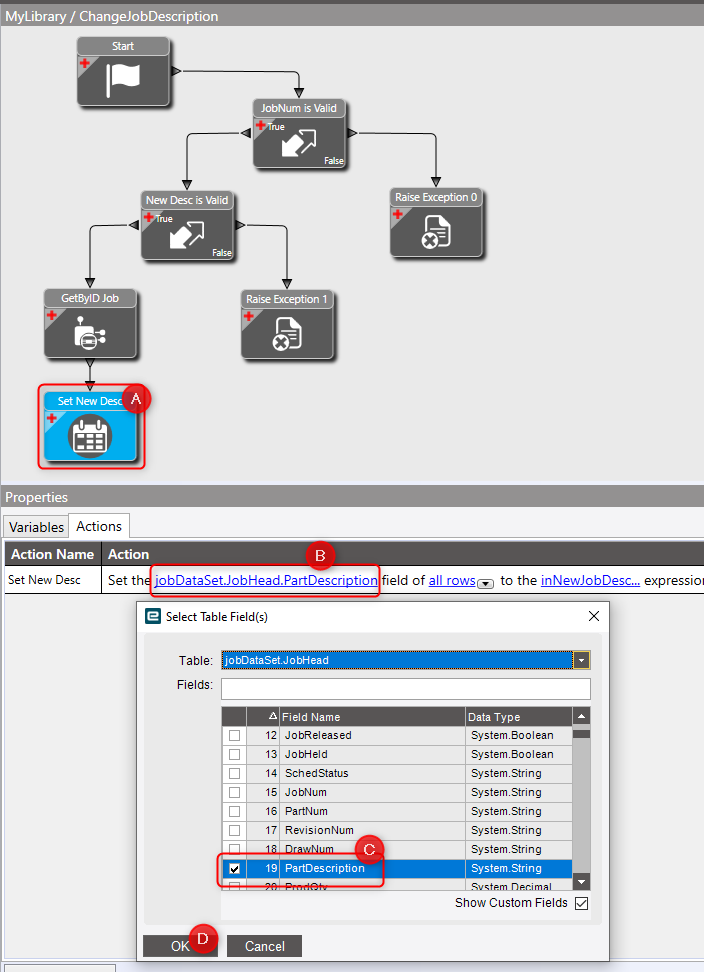

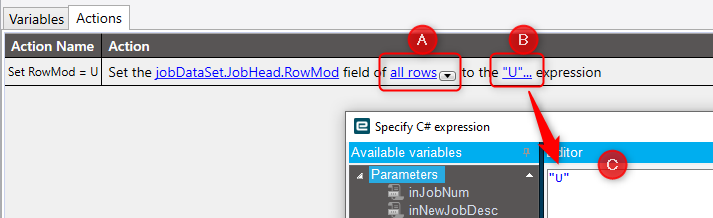
This widget will assign the new job description to the PartDescription field of the job. We will need another Set Field widget to tell the business object that the job record has been modified, by setting the RowMod field of the record to “U”, as for “Updated”.

The last step is sending the updated Tableset to the business object, to update the database with our new job description. To do so, we will now invoke the Update method of the business object with another Invoke BO Method widget.

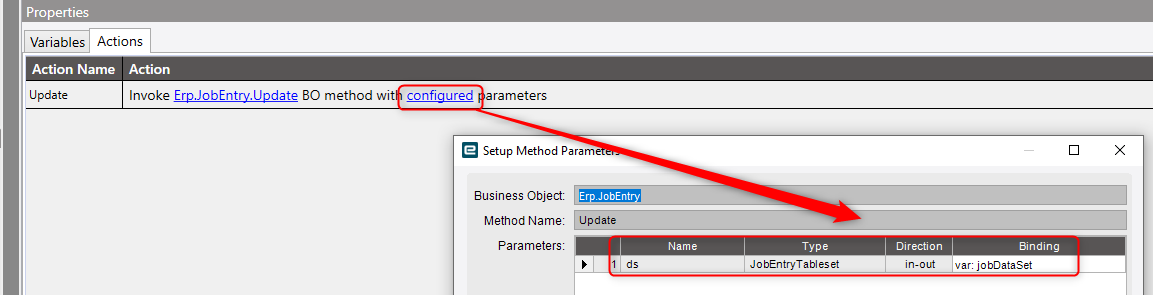
Now that all is said and done, save and exit the canvas. Make sure that your function is not disabled and save your library.

Last thing we will do is promote our library to production, otherwise we won’t be able to call it from a screen customization or Rest API :

Our function is now ready for testing, which we will cover in the next post.
Source: https://www.allaboutthaterp.com
Setting Up a New Library and Function – P1
Epicor functions is new tool introduced in 10.2.500 that flipped the BPM world on its head. You can now easily centralize your business process, launch them on demand from anywhere and even schedule it, all without relying on shaky UBAQ BPM triggering (if you know, you know). If you haven’t gotten on the train yet, here’s the introduction you need. In this first post of this series, we’ll create and configure a library and a function.
Security group setup
There are 3 default security groups that you can use to define who can do what with Epicor Functions:
- Functions Power Developer : They can do pretty much anything but Promote or Demote a library from production.
- Functions Developer : Same as Power Developer but they cannot use custom code.
- Functions Administrator : They can’t create or delete a library, they can’t create or delete a function. The only thing they can do is “managing” libraries. For example, they are the only people that can Promote or Demote a library from production.

Security Managers can bypass those restrictions, obviously.
Creating a library
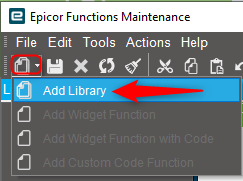
Epicor functions are organized in libraries, so first thing first, we need to create one. Launch “Epicor Functions Maintenance” and add a new library.
Give it a meaningful name and save.

Next step is configuring the library.


- Make sure to share the library with you developer team by selecting a security group. If you don’t, only the library owner will be able to create and edit functions in this library. For example, you can use “Functions Developer” for this purpose.
- Select in which companies your library can be used. If you forget this step, you won’t be able to call the library with Kinetic Application Studio or BPMs.
Creating a function
Let’s say that we want to create a simple function to update any job description. Here are the 3 function type from which we can choose:
- Widget Function : The custom Code widget is simply not available. This is the only option available to “Functions Developer”.
- Widget Function with code : Custom code widget is available. Requires “Functions Power Developer” rights.
- Custom Code Function : There are no widgets in this one ; the canvas is replaced by an IDE in which you write code directly. Requires “Functions Power Developer” rights.
Since we will not need any code, we’ll create a basic Widget Only function.

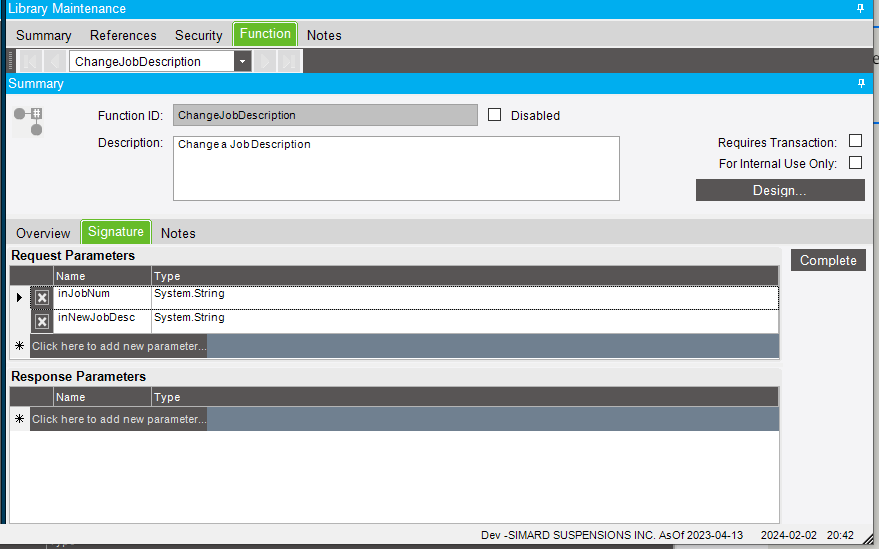
Give it a meaningful name and description, then save.

First thing we’re going to do is set the signature of the function, which are basically the parameters that the function will receive and/or send back. Hit that Edit button to edit the parameters.

In our example, the function will receive a JobNum and a new description as parameters. Make sure to select the correct type (string, int, etc.) for your parameters then click Complete.
Next step is adding our references. One big difference between Epicor Functions and BPM is that you have to declare exactly which business object and tables you will use, which is not necessary with BPM.
For this example, we will need to add a reference to the JobEntry business object to update job descriptions.

Managing libraries and functions : balancing reusability and orthogonality
Some may ask:
- Why do we need to manage functions in libraries in the first place ?
- Why not simply create one “General” library and group all the functions there ?
- Or should we group similar functions together ? For example, do we group all the functions related to jobs in the same library ?
Before answering those questions, let me tell you the story of that time when I got bitten in the a$$ by a simple BAQ change.
Not so long ago, I was working on a feature to validate Excel BOMs pushed by the engineering department. The issue was that the part numbers in the BOM were about 60% accurate ; the rest were supplier part numbers, inactive parts, substituted parts, or just plain wrong. So I wrote a neat little BAQ to extract a list of all valid part numbers and the translations to feed an Epicor Function. Long story short, the feature was a blast, it worked beautifully.
Later, I found myself working on another feature where I needed to validate part numbers requested by the shop floor. I decided to reuse the same exact BAQ for this purpose. My reasoning was legit ; if for some reason the validation logic must change, I’ll update that single BAQ and all the features depending on it will be updated. There would be no need to maintain multiple BAQs with the same logic, with the risk of having differences.
In the following weeks, I ended up reusing that BAQ in a least 3 other different features (Epicor Functions, custom code, etc.). I worked fast, I got things done, life was good.
Then, one day, I got a call from the super user who translates engineering BOMs : a new type of translation was required. He realized that, sometimes, engineering inputs SolidWorks file name as part number in the BOM. By luck, there was a place in the database where the translation existed, so all I needed was to modify the BAQ. Long story short, I ended up changing a field name in the BAQ, thinking that it was no big deal. I ran some tests, then deployed to production.
Well, turns out that it was a big deal after all. I started receiving calls from users, all sorts of errors were popping everywhere. Apparently, I ended up reusing that BAQ more often that I remembered, and in ways that I had not anticipated when it was designed. The old field was referenced everywhere and now errors where flooding.
I ended up copying the original BAQ to create one specifically for each feature, so that in the future if I have to make a change in one feature, it won’t impact the others. However, I will have to maintain all those BAQs if the validation logic were to be changed, with obviously the risk of forgetting some along the way.
That’s the key takeaway from this story. Should you organize your library and functions to maximize reusability or should you split them by feature to ensure that each piece is independent from the others (that’s called orthogonality in programming) ? There is no definitive answer and there will never be. IMHO, it’s all about balance and clarity. Here are my guiding principles :
- If a library is to be shared by multiple features, make it obvious. For example, you can use the prefix “Shared” for every shared library. That way you know to be careful when updating stuff.
- If a library is specific to a single feature, make it obvious. I personally prefix all my stuff with the name of the feature. For example, my BAQs, functions libraries, and dashboard have the prefix “PartList”, and I know that they are all related to the engineering part list import feature.
- When you create a reusable function, think small. Try to design your functions to answer a single question or perform a single action. For example, if you want to create a function to create a job, you could instead create a library named “JobCreation” and split the job creation into functions for each single operation required in the process :
- Create Job Header
- Create demand links
- Get Details
- Release Job
- Schedule Job
This way, you can combine those like Lego blocks anyway you want and that makes them much easier to reuse.
- If you ever find yourself at the crossroad, when you have to choose between reusing an existing function and making it specific, think carefully of the consequences and keep in mind that requirements will change over time and your stuff will need to change to. No requirement or business decision is definitive forever.
- In my experience, trying to create and maintain a “Where Used” list of stuff in the comments of your library or function is a waste of time. You will forget to update it at one point and once it’s desynchronized, it’s useless.
Source: https://www.allaboutthaterp.com
Calling a BAQ in BPM or Epicor Function
It is possible and not that complicated (when you know how) to call a BAQ in a BPM or an Epicor function and use the result. Here is a down-to-earth, step-by-step tutorial with some examples
The procedure is exactly the same for a BPM or a function, with the only difference that, for a function, it is necessary to add a reference to the DynamicQuery business object.
- Go to the “References – Assemblies” tab
- Click on the “Add” button
- In the “Assembly name Filter” field, enter “Dynamic”
- You have to wait 1-2 minutes, the time for the list to load (I know, it’s crap). In the grid, select “Ice.Contracts.BO.DynamicQuery” when it appears.
- Finally click on “OK”

You will need to do the same thing in the “References – Services” tab.
Widget #1 : Get Query Execution Parameters
In the designer, we will first add an “Invoke BO Method” widget and choose the method “GetQueryExecutionParametersByID”.


Then configure the widget.


- queryID: Name of BAQ
- Return value: Create a new variable and name it “baqExecutionParams”
Widget #2 (Optional) : Set Query Execution Parameters
This step is necessary only if you want to filter the BAQ result or if a parameter is required by the BAQ. Otherwise, you can skip.
Drop a custom code widget in the canvas.
And use this code snippet as a reference to build the BAQ execution parameters, depending on your needs.
//Method #1 : A parameter is required by the BAQ
Ice.Tablesets.ExecutionParameterRow newParamRow = new Ice.Tablesets.ExecutionParameterRow();

newParamRow.ParameterID = "OrderNum"; //ID of the parameter in the BAQ
newParamRow.IsEmpty = false; //Set this to true if you want to trigger "skip condition if empty" on the BAQ parameter
newParamRow.ParameterValue = 152; //value of the parameter
newParamRow.ValueType = "int"; //By default parameter are sent as string, this line is necessary otherwise

baqExecutionParams.ExecutionParameter.Add(newParamRow); //Add paramter row. You can define and add as many rows as needed


//Method #2 : Filter the BAQ
Ice.Tablesets.ExecutionFilterRow newFilterRow = new Ice.Tablesets.ExecutionFilterRow();

newFilterRow.DataTableID = "OrderHed"; //Table Name in the BAQ
newFilterRow.FieldName = "OrderNum"; //Field Name of the table
newFilterRow.CompOp = "="; //Operator, such as =, <>, >, >=, <, <=
newFilterRow.RValue = 152; //Value

baqExecutionParams.ExecutionFilter.Add(newFilterRow); //Add filter row. You can define and add as many rows as needed
Widget #3 : Execute BAQ
Add an “Invoke BO Method” widget and choose the “ExecuteByID” method.

We then configure the widget.
- queryID: Name of BAQ
- executionParams: select the variable “baqExecutionParams” created earlier
- Return value: Create a new variable and name it “baqDataSet”

And… Thats it. Now what ?
That’s the basics to call a BAQ. Here are some examples on how to use the BAQ results.
Example #1 : Condition Widget
Place a condition widget on the canvas and choose the condition “The custom code condition is valid”
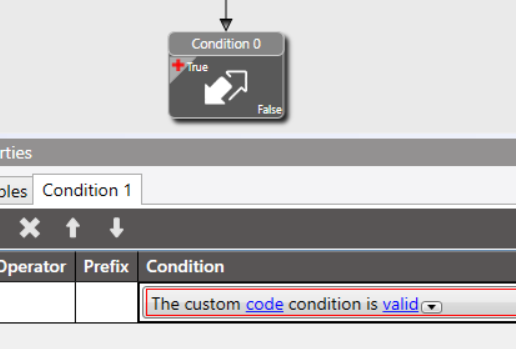
Click on “Code” to configure the condition. In the code editor, enter something like:
baqDataSet.Tables[0].AsEnumerable().Where(w=>Convert.ToInt32(w["OrderHed_CustNum"]) == 152).Any()
Let’s dissect this line of code:
- baqDataSet.Tables[0]. AsEnumerable(): This is a list containing all the records returned by the BAQ, “baqDataSet” beeing the variable created earlier in this tutorial
- Where(w=>Convert.ToInt32(w[“OrderHed_CustNum”]) == 152): The C# LINQ syntax is used to find all rows in the BAQ for which the value of the column “OrderHed_CustNum” is equal to 152. Because the widget does not know of what type is the data returned by the BAQ, it must be specified with Convert.ToInt32. One can use ToString(), ToBoolean(), etc for other data types.
- Any(): Indicates whether, true or false, the previous criterion (Where()) found at least one row in the BAQ result
In the end, this condition widget will return “True” if the BAQ contains at least one order with the CustNum = 152.
Small detail: How do you know that the field is called “OrderHed_CustNum” in the BAQ? It can be seen here:
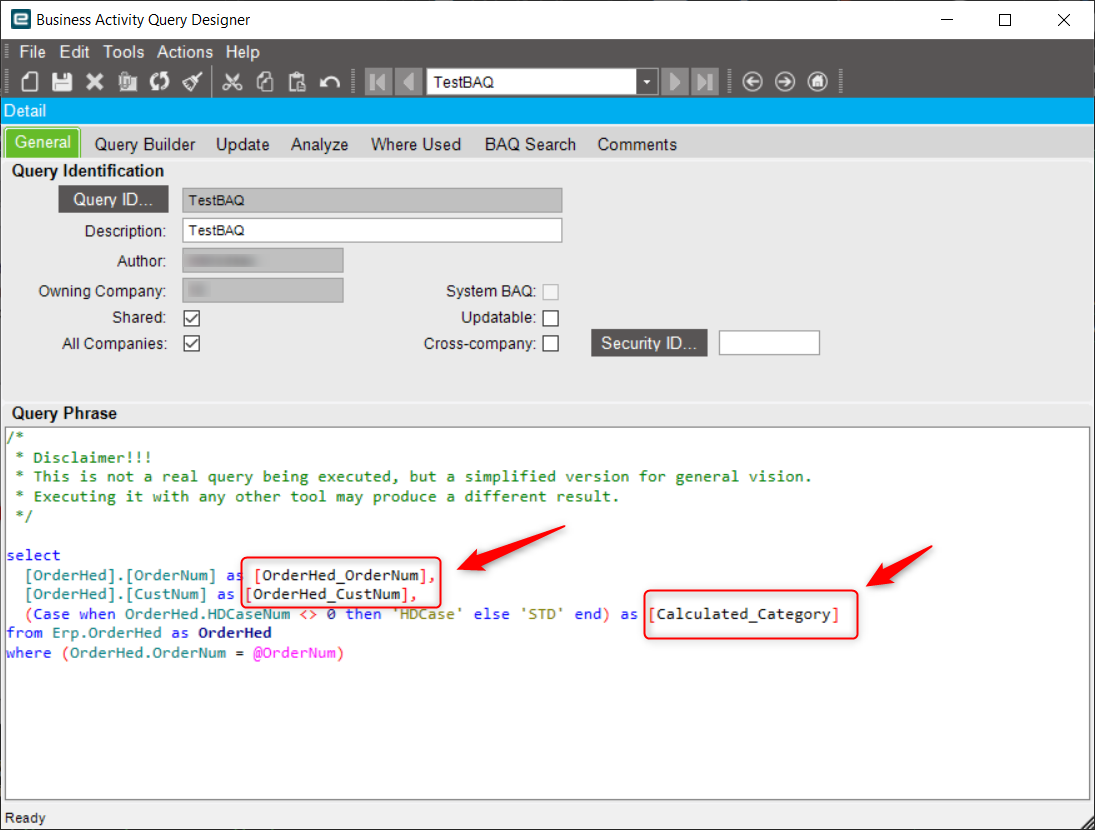
Your calculated fields are therefore available, with the prefix “Calculated_”
Example #2: Iterate on each row returned by the BAQ
Place a Custom Code widget on the canvas and enter the following code in it:
foreach(DataRow baqRow in baqDataSet.Tables[0].Rows) //Loop on each row returned by the BAQ
{
    string custNum = Convert.ToString(baqRow["OrderHed_CustNum"]); //Get the CustNum for the current row
    //Other code here
}
With this snippet, you will be able to add code that will be executed on each row returned by the BAQ
Source: https://www.allaboutthaterp.com
Calling a BAQ with parameters using Application Studio
With Application Studio, it is possible to call a BAQ by passing parameters and save the result in a DataView. Here is one way to do it.
In an event, add the “Rest-ERP” widget.
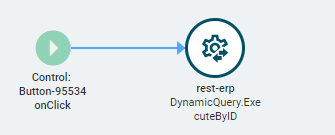
In the widget properties, go to the “Rest Services” section.
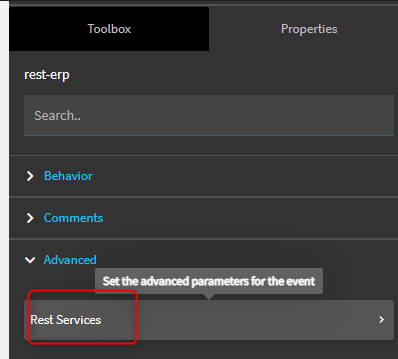
Enter the following values in the properties.

Go to the “Rest Sevices – Method Parameters” section and enter the name of the BAQ in the “queryID” property.

Still in the “Rest Sevices – Method Parameters” section, go to the “executionParams” property and add a “Dataset Model”.

Here is the JSON syntax to use to pass your parameters to the BAQ. Note that it is possible to pass data from a DataView into the “ParameterValue” property using the syntax “{dataView.Field}”.

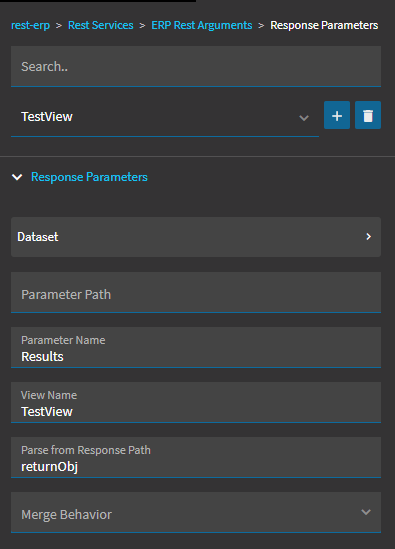
Now go to the “Rest Services – ERP Rest Arguments – Response Parameters” section to configure the saving of the data returned by the BAQ in a DataView. In this example, the name of the DataView is “TestView”.
Source: https://www.allaboutthaterp.com
- 1
- 2
- …
- 61
- Tiếp theo →
